


I still remember the day I decided to tackle my cluttered closet head-on, determined to turn it into a peaceful oasis. It was the culmination of years of frustration with the common myth that DIY closet organization has to be a daunting, expensive task. The truth is, it’s not about hiring a professional or breaking the bank on fancy storage systems – it’s about simplicity and functionality. My journey into the world of DIY closet organization began with a simple realization: a clutter-free space can have a profound impact on one’s mental clarity and productivity.
As you dive into this article, you can expect practical advice and honest tips on how to transform your closet from chaos to couture. We’ll explore the essentials of DIY closet organization, from decluttering and categorizing to clever storage solutions that won’t dent your wallet. My goal is to empower you with the knowledge and confidence to take on your closet organization project, no matter how overwhelming it may seem. By the end of this guide, you’ll be equipped with the skills to create a space that not only reflects your personal style but also provides a serene retreat from the world outside.
Table of Contents
Guide Overview: What You'll Need
Total Time: 4 hours 30 minutes
Estimated Cost: $100 – $250
Difficulty Level: Intermediate
Tools Required
- Drill (with screwdriver and drill bits)
- Tape Measure
- Level
- Hammer
- Utility Knife (with extra blades)
- Pencil and Marker
Supplies & Materials
- 2-in x 4-in lumber (for shelving frames)
- 3/4-in plywood (for shelving boards)
- Closet Organizer System (optional)
- Shelves and Shelf Brackets
- Drawers and Drawer Slides (optional)
- Hooks and Racks
Step-by-Step Instructions
- 1. First, let’s start by purging the clutter from our closet. This means taking everything out and sorting items into three piles: keep, donate/sell, and discard. Be ruthless – if you haven’t used it in the past year, it’s probably safe to get rid of it. Consider the 80/20 rule, where 80% of the time you likely only wear 20% of your clothes.
- 2. Next, we need to assess the space and decide on a layout that works for us. Take note of the closet’s dimensions, the location of doors and windows, and any obstructions like plumbing or electrical outlets. Consider the traffic path in your closet and how you can optimize it for easy movement. Think about what you need to store, from clothes and shoes to accessories and luggage.
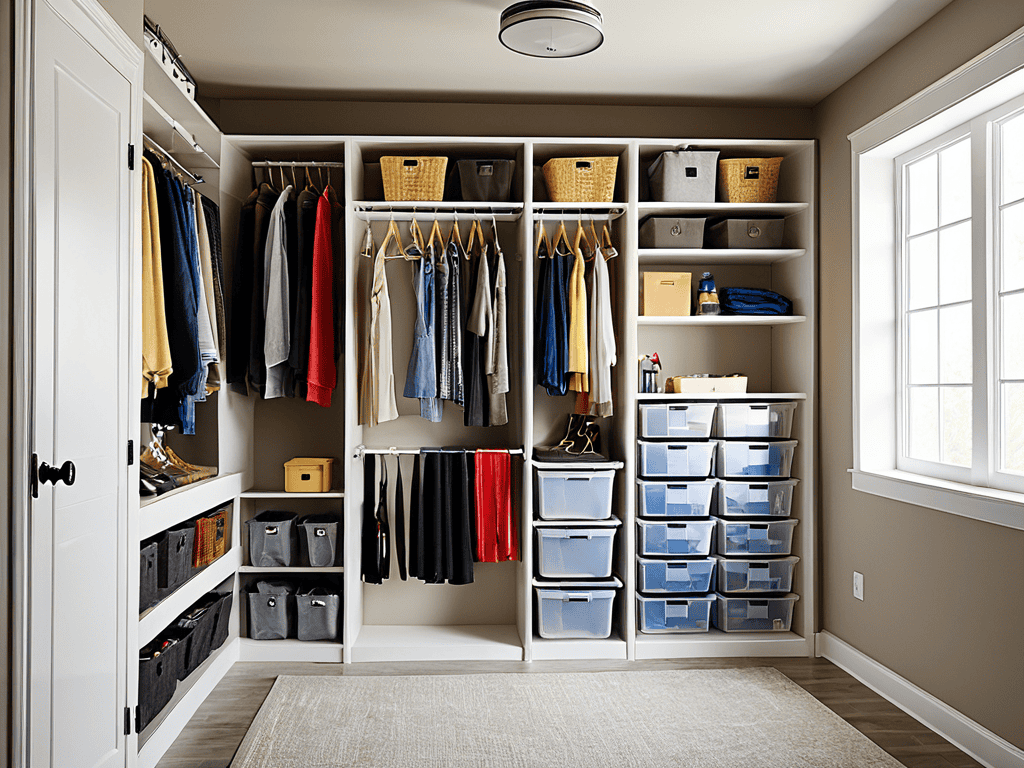
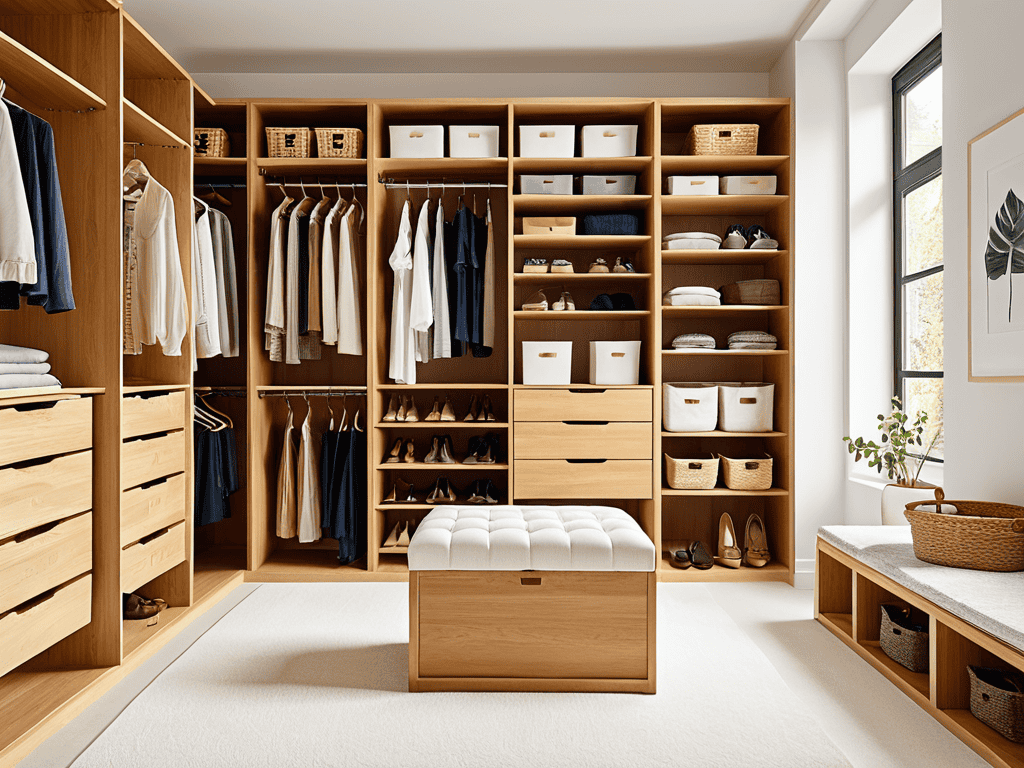
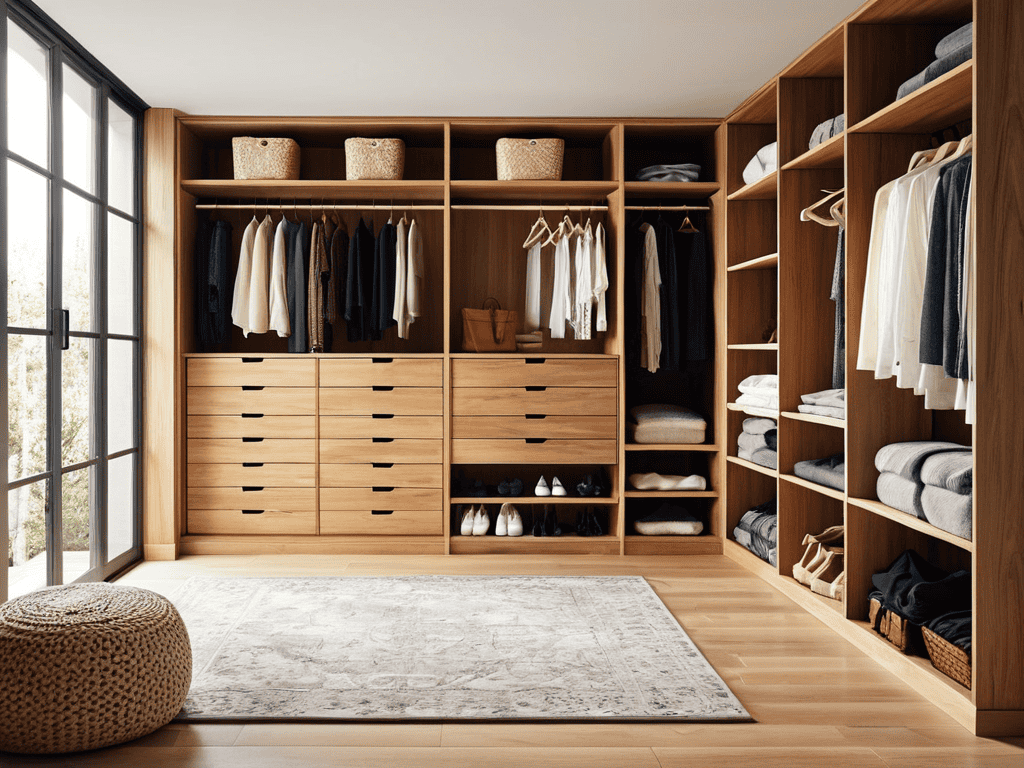
- 3. Now it’s time to install shelving and storage units. You can use pre-made shelves or opt for a custom solution, depending on your budget and DIY skills. Consider using double rods to maximize hanging space, and adjustable shelves to accommodate items of different sizes. Don’t forget to leave some space for future additions or changes.
- 4. With the basic structure in place, let’s move on to organizing our clothes. Start by categorizing items into types (e.g., tops, bottoms, dresses) and then group similar items together. Use dividers or bins to separate items within each category, and consider using color coding to add a pop of personality to your closet.
- 5. To make the most of our closet’s vertical space, let’s add some hooks and baskets. Hooks are perfect for hanging belts, bags, or accessories, while baskets can store items like socks, underwear, or out-of-season clothes. Consider using stackable baskets to maximize storage, and label each hook so you can easily find what you need.
- 6. Moving on to shoe storage, we have a few options to choose from. You can use a shoe rack, over-the-door shoe organizer, or even a shoe cubby. Consider the type of shoes you own and how often you wear them, and group similar shoes together (e.g., all heels or all sneakers). Don’t forget to leave some space for future shoe acquisitions.
- 7. Finally, let’s add some finishing touches to our newly organized closet. Consider adding a mirror or some decorative lighting to create a welcoming atmosphere. You can also add some plants or artwork to make the space feel more personal. Take a step back and admire your hard work – you’ve successfully tamed the closet beast!
Diy Closet Organization
As you work on maximizing closet storage space, consider the importance of _customizing_ your approach to fit your specific needs. This might involve incorporating closet organization systems for small closets or investing in custom closet shelving ideas that make the most of your available space. By taking a thoughtful and tailored approach, you can create a closet that is both functional and beautiful.
As you’re working on transforming your closet space, it’s essential to stay inspired and motivated. I’ve found that browsing through online communities, such as nzgirls, can be a great way to discover new ideas and connect with like-minded individuals who are also passionate about DIY projects and home organization. By exploring these resources, you can gain a fresh perspective on how to tackle your closet organization project and make the most of your space, ultimately turning it into a peaceful retreat that reflects your personal style.
When it comes to keeping your closet organized, closet decluttering tips and tricks can be a huge help. One simple strategy is to use diy closet dividers and separators to keep similar items grouped together. This can make it easier to find what you need and prevent clutter from building up in the first place. Additionally, consider using baskets and bins for closet storage to keep small items like socks and accessories organized and out of the way.
By implementing a few simple strategies, you can keep your closet organized and clutter-free. Remember to use vertical space by installing shelves or storage units that go up to the ceiling, and consider labeling your storage containers so you can easily find what you need. With a little creativity and effort, you can create a closet that is a peaceful and functional oasis.
Decluttering Tips for Small Closets
When tackling a small closet, it’s essential to be ruthless about what you keep. Sort items into three piles: keep, donate, and discard. Be honest with yourself – if you haven’t worn something in a year, it’s likely time to let it go. Consider the 80/20 rule: 80% of the time, you likely wear 20% of your clothes. Focus on keeping only the items that bring you joy or serve a purpose.
By paring down your belongings, you’ll be able to see what you have and make the most of your limited space. This will also help you identify what type of storage solutions you need, such as bins for accessories or shelves for folded items.
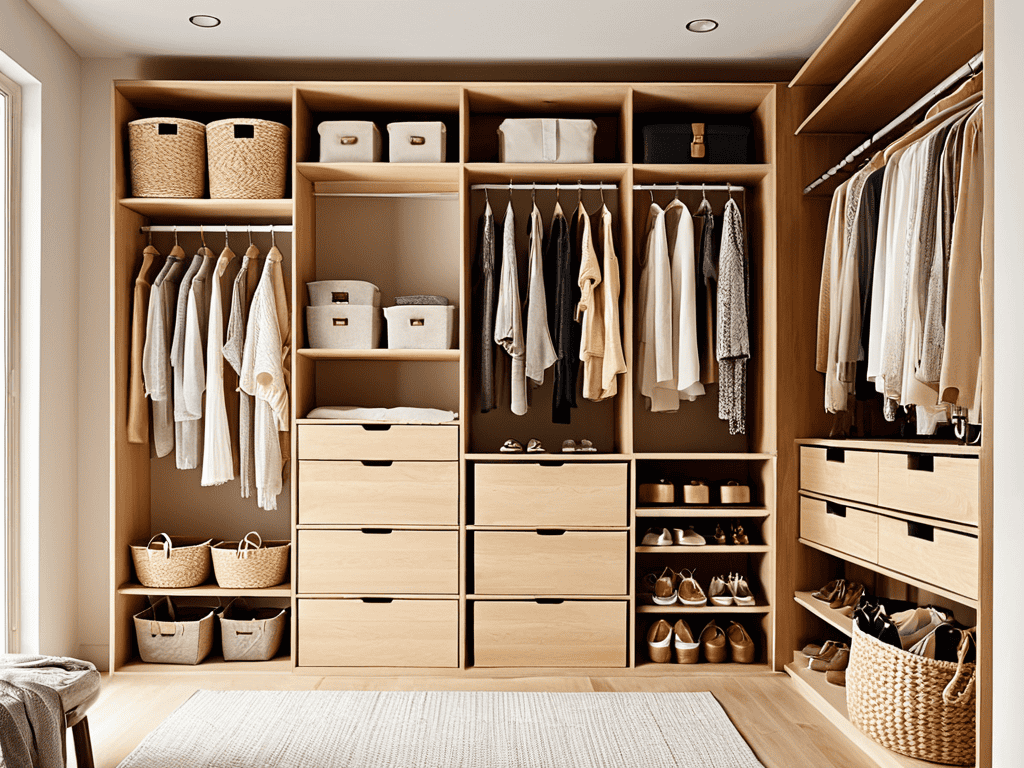
Maximizing Storage With Custom Shelving
To take your closet organization to the next level, consider custom shelving solutions. This can include installing shelves of varying heights to accommodate different types of clothing and accessories. By tailoring your shelving to your specific needs, you can make the most of your closet’s vertical space and keep your belongings organized and easily accessible.
Custom shelving can also be adapted to fit around any obstacles in your closet, such as windows, doors, or heating vents, ensuring that no space goes to waste. With a little creativity, you can create a closet that is both functional and beautiful, providing a peaceful retreat from the chaos of daily life.
5 Game-Changing DIY Closet Hacks to Revolutionize Your Space
- Start with a purge: take everything out of your closet and sort items into three piles – keep, donate, and discard – to get a clear picture of what you have and what you need to organize
- Use vertical space: install shelves, hooks, or a pegboard to maximize storage and keep your floor clear for a more spacious feel
- Implement a color-coded system: organize your clothes by type, season, and color to create a visually pleasing and easy-to-navigate closet
- Invest in multi-functional storage: use bins, baskets, and drawers to store items like socks, accessories, and out-of-season clothes, keeping them out of the way but still accessible
- Maintain your space: schedule regular tidying sessions to keep your closet organized and clutter-free, and make adjustments to your system as needed to ensure it continues to work for you
Key Takeaways for a Tranquil Closet
By implementing custom shelving and storage solutions, you can unlock hidden space and create a more peaceful closet environment
Decluttering is key: removing unwanted items and categorizing your belongings is crucial for maintaining a sense of calm and control in your closet
With a little creativity and some simple DIY hacks, you can transform your closet from a chaotic mess into a serene oasis that sparks joy and inspires your daily style
Taming the Chaos
A organized closet is not just a reflection of our space, but a reflection of our minds – and it’s amazing how a little DIY magic can transform both.
Emily Wilson
Bringing Order to Chaos
As we’ve explored the world of DIY closet organization, it’s clear that maximizing storage and decluttering are key to transforming your space. From custom shelving to clever storage solutions, the steps outlined in this guide provide a solid foundation for taking control of your closet. By implementing these strategies, you’ll be well on your way to creating a peaceful oasis that sparks joy and serenity. Whether you’re dealing with a spacious walk-in or a cozy reach-in closet, the principles remain the same: simplify, categorize, and optimize.
As you embark on your DIY closet organization journey, remember that it’s not just about the physical space – it’s about creating a mindset that values clarity and intention. By embracing this process, you’ll not only gain a beautifully organized closet, but also a sense of empowerment and control that extends far beyond your wardrobe. So, take a deep breath, roll up your sleeves, and get ready to unlock the full potential of your closet – and your life.
Frequently Asked Questions
How can I determine the best shelving configuration for my specific closet size and shape?
To find your perfect shelving fit, grab a tape measure and get cozy with your closet’s dimensions. Consider the items you want to store, and think about the flow you want to achieve. Ask yourself: what are my closet’s quirks, and how can I work with them?
What are some creative ways to utilize the space behind a closet door for additional storage?
Let’s squeeze out some extra storage from that often-wasted space behind the closet door. Consider adding over-the-door storage racks, hooks, or even a shoe organizer to maximize your closet’s potential. You can also use adhesive hooks or a magnetic board to hang belts, scarves, or accessories, keeping them organized and out of the way.
Can I use recycled or repurposed materials to build custom closet organizers and still achieve a polished look?
Absolutely, you can use recycled or repurposed materials to build custom closet organizers and still achieve a polished look. Consider upcycling old pallets, crates, or wooden dowels to create unique shelves or storage units that add a touch of character to your closet. With a little creativity and some TLC, you can turn trash into treasure and create a one-of-a-kind closet organizer.