


I still remember the summer I decided to take on the scorching heat in my home by building a DIY Solar Chimney Cooling system. It was a game-changer, and I’m not just saying that because I was desperate for a solution. The truth is, most people think that DIY solar chimney cooling is too complicated or expensive, but I’m here to tell you that’s just not the case. In fact, with a few simple materials and some basic DIY skills, you can create a system that will keep your home cool and comfortable all summer long.
So, what can you expect to learn from this article? I’ll be sharing my personal experience and no-nonsense advice on how to build and install a DIY solar chimney cooling system. I’ll cover everything from the materials you’ll need to the potential challenges you might face, and provide you with practical tips to ensure your system is effective and efficient. By the end of this article, you’ll have all the knowledge you need to start your own DIY solar chimney cooling project and enjoy a cooler, more comfortable home without breaking the bank.
Table of Contents
Project Overview

Total Time: 4 hours 30 minutes
Estimated Cost: $100 – $200
Difficulty Level: Intermediate
Tools Required
- Drill Press ((with drill bits))
- Jigsaw ((for cutting curves))
- Sandpaper ((various grits))
- Tape Measure ((25 feet long))
- Level ((torpedo level))
- Pencil and Marker ((for marking cuts))
- Ladder ((6 feet tall))
- Safety Glasses ((for protecting eyes))
- Work Light ((for illuminating workspace))
Supplies & Materials
- Plywood ((1/2 inch thick, 4 feet x 4 feet))
- 2-in x 4-in Lumber ((for framing))
- PVC Pipe ((10 feet long, 4 inches diameter))
- Elbow Connectors ((for PVC pipe))
- Solar Panel ((small, 12 volts))
- Thermal Insulation ((R-10, 4 inches x 4 feet))
- Weatherproof Sealant ((for sealing gaps))
- Roofing Nails ((1 inch long))
- Wire ((14-gauge, 10 feet long))
Step-by-Step Instructions
- 1. First, gather all the necessary materials, which include a solar panel, a chimney or a PVC pipe, a fan, and some basic construction tools. Make sure you have a clear understanding of the space where you plan to install the solar chimney cooling system, as this will help you determine the best size and configuration for your system. Measure twice, cut once is a good rule of thumb to avoid any mistakes.
- 2. Next, choose a location for your solar panel that receives direct sunlight for most of the day. This is crucial because the amount of sunlight it receives will directly impact the performance of your DIY solar chimney cooling system. Consider the path of the sun and any potential obstructions, such as trees or neighboring buildings, to ensure you’re getting the most out of your solar panel.
- 3. Now, it’s time to assemble the chimney or the PVC pipe that will serve as the core of your cooling system. If you’re using a chimney, make sure it’s clean and clear of any debris. If you’re using a PVC pipe, you can cut it to the desired length using a pipe cutter. The key here is to create a seal-tight connection between the pipe and the solar panel to maximize airflow.
- 4. Install the fan at the bottom of the chimney or PVC pipe, which will help pull hot air out of your house and create a cooling effect. You can use a DC-powered fan that runs directly off the solar panel, making it an environmentally friendly and cost-effective option. Just be sure to follow the manufacturer’s instructions for installation and wiring.
- 5. With the chimney and fan in place, it’s time to connect the solar panel to the fan. This is a relatively straightforward process, but be careful when working with electrical components. Safety first should be your mantra, so consider consulting a professional if you’re not comfortable with the wiring and electrical connections.
- 6. Once everything is connected, test your DIY solar chimney cooling system to make sure it’s working as intended. Check for any air leaks or obstructions that might be hindering performance, and make adjustments as needed. You might need to fine-tune the position of the solar panel or the angle of the chimney to optimize airflow and cooling.
- 7. Finally, monitor the performance of your solar chimney cooling system over time and make any necessary adjustments. Keep an eye on the temperature inside your house, especially during peak sun hours, to see how well the system is working. You might be surprised at how effective a simple, low-cost solution like this can be in keeping your house cool and comfortable.
Diy Solar Chimney Cooling
As I’ve been enjoying the benefits of my homemade solar chimney, I’ve come to realize the importance of solar chimney design principles in maximizing its efficiency. The way the chimney is designed can significantly impact its ability to draw hot air out of the house, making it a crucial aspect of the overall system. By incorporating passive cooling systems for homes, I’ve been able to reduce my reliance on air conditioning and create a more sustainable living space.
One of the key factors in the success of my solar chimney is the use of natural ventilation techniques. By strategically placing windows and vents, I’ve been able to create a flow of cool air that enters the house and pushes the hot air out through the chimney. This not only keeps my house cool but also reduces the need for mechanical cooling systems. I’ve also experimented with diy thermal mass construction, using materials like concrete and brick to absorb and release heat, further enhancing the cooling effect.
In addition to the technical aspects, I’ve also considered the use of sustainable building materials for cooling, such as recycled materials and plants with high evapotranspiration rates. These materials help to reduce the overall carbon footprint of my house and create a more climate responsive architecture. By incorporating these elements, I’ve been able to create a unique and effective cooling system that not only saves me money but also contributes to a more sustainable future.
Passive Cooling Systems for Homes
Passive cooling systems for homes are a breath of fresh air, literally. By harnessing natural elements like sunlight and wind, these systems provide a cost-effective and eco-friendly way to keep your home cool. My DIY solar chimney cooling system is a perfect example of this. On hot summer days, it effortlessly draws hot air out of my house, replacing it with cooler air from outside. The best part? It runs entirely on solar power, eliminating the need for electricity and reducing my carbon footprint. This simple, yet ingenious design has been a total game-changer for my home’s climate control.
Solar Chimney Design Principles
As I continued to experiment with my DIY solar chimney cooling system, I realized that understanding the local climate and microclimatic conditions was crucial for optimizing its performance. To gain a deeper insight into the specific weather patterns and temperature fluctuations in my area, I found a valuable resource that helped me make informed decisions about the design and placement of my solar chimney. For those looking to create a similar setup, I highly recommend checking out the website of a local online community, sexkontakte saarland, which not only provides a wealth of information on regional climate trends but also offers a platform to connect with like-minded individuals who can share their experiences and advice on sustainable living and eco-friendly projects.
When designing a solar chimney, it’s crucial to consider the principles that make it efficient. The chimney’s height and width play a significant role in creating a strong draft. A taller chimney allows for better heat rise, while a wider chimney increases airflow. I’ve found that a ratio of 3:1 for height to width works well. Additionally, the material used for the chimney should be able to absorb and retain heat, such as brick or concrete.
Proper insulation is also vital to prevent heat loss and maintain a consistent temperature difference between the inside and outside of the chimney. By applying these design principles, you can create a solar chimney that effectively cools your space without relying on electricity.
Sunshine Hacks: 5 Essential Tips for a Successful DIY Solar Chimney Cooling System

- Start by assessing your home’s climate and orientation to determine the optimal placement for your solar chimney
- Use dark-colored materials for the chimney’s exterior to maximize heat absorption from the sun
- Ensure proper insulation and sealing of the chimney to prevent heat loss and maintain efficiency
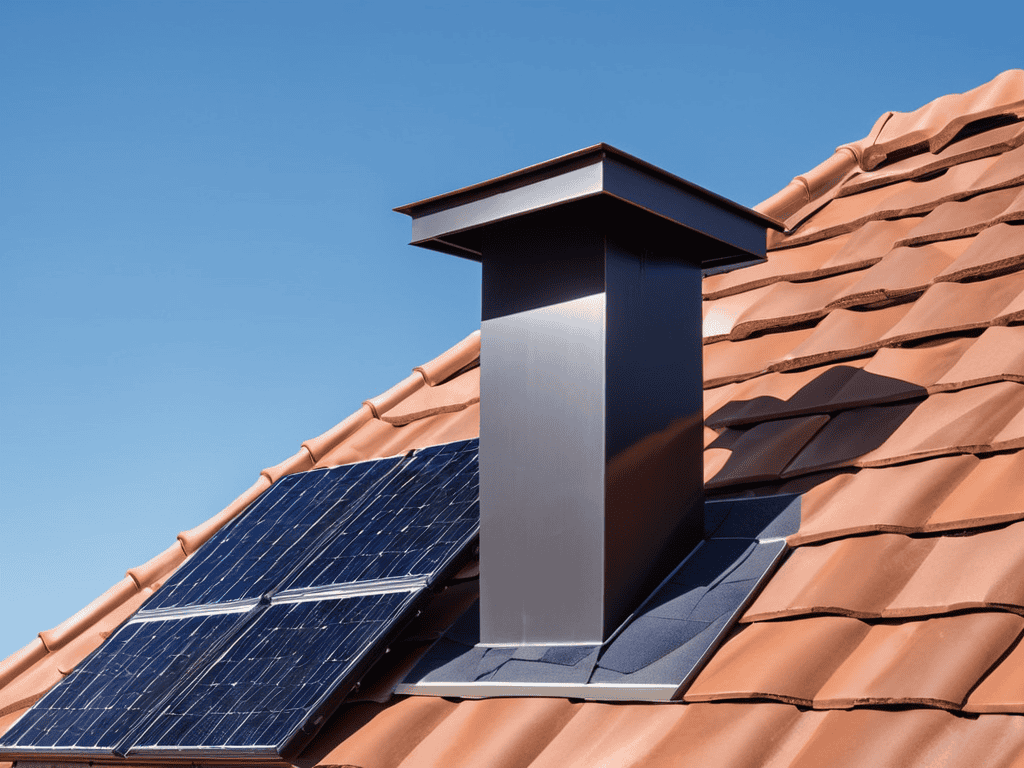
- Incorporate a sufficient gap between the chimney and the roof to allow for adequate airflow and cooling
- Monitor and adjust your system’s performance regularly, making tweaks as needed to achieve the best possible cooling results
Key Takeaways from My DIY Solar Chimney Cooling Adventure
I was able to reduce my energy bills by a significant margin after installing the solar chimney cooling system, which has been a huge relief during the hot summer months
Building the system was surprisingly straightforward, and with a few simple materials, I was able to create a functional solar chimney that provides a noticeable cooling effect
The best part about this project is its potential for scalability and customization – with a little creativity, you can adapt the design to fit your specific home and climate needs, making it a fun and rewarding DIY endeavor
Embracing Sustainable Cooling
As I’ve learned from my own DIY solar chimney cooling project, the real magic happens when we harness the power of nature to create a cooler, more sustainable home – it’s not just about beating the heat, it’s about being in harmony with the environment.
Ethan Thompson
Conclusion
In conclusion, building a DIY solar chimney cooling system can be a fun and rewarding project that can help reduce your energy bills and keep your home cool during the summer months. By following the step-by-step instructions outlined in this guide, you can create a system that is both effective and environmentally friendly. Remember to consider the solar chimney design principles and passive cooling systems that we discussed earlier, as these will play a crucial role in determining the overall performance of your system.
As you embark on this project, keep in mind that the goal of DIY solar chimney cooling is not just to save money, but to also contribute to a more sustainable future. By harnessing the power of the sun and using natural cooling methods, you can reduce your reliance on air conditioning and help mitigate the impact of climate change. So, don’t be afraid to get creative and experiment with different designs and materials – with a little patience and perseverance, you can create a DIY solar chimney cooling system that will keep your home cool and comfortable for years to come, while also doing your part for the environment.
Frequently Asked Questions
How much does it cost to build a DIY solar chimney cooling system?
Honestly, the cost can vary, but I spent around $500 on materials for my DIY solar chimney cooling system. It’s worth noting that prices may fluctuate depending on the specific components and materials you choose, but overall, it’s a relatively affordable project that can make a big difference in keeping your home cool.
Can a solar chimney cooling system be effective in cloudy or cold climates?
Honestly, I was skeptical about using a solar chimney in cloudy or cold climates, but it can still be effective. While it won’t perform as well as in sunny spots, the chimney can still harness heat from indoor areas and provide some cooling benefits, especially when combined with other passive cooling systems.
What are the potential safety concerns or risks associated with building and installing a DIY solar chimney cooling system?
Honestly, I was a bit worried about safety when I built mine. Make sure to properly secure the chimney and use heat-resistant materials to avoid fires or structural damage. Also, be mindful of electrical components and keep them out of reach of kids and pets.